
Google Tag Manager 101 Part 1 - The Basics
1. CREATE AN ACCOUNT AND A CONTAINER
Let's assume you have a live website with a Google Analytics Universal Tracking Code. In order to start using Google Tag Manager, you will need a code change in order to change the snippet that appears on every web page. You may be able to do this yourself or you may need your developers to do it for you. Go to item 5 on this page to read more.
First, if you don't already have one, create a Google Tag Manager Account. Create it here.

At this stage will also create your first Container within the Account. Each container has a unique GTM code.
An Account can have more than one container so if you have a test website, you can create a separate Container in order to test your tags before deploying to live.
2. GOOGLE ANALYTICS 3
2.1 ADD THE GOOGLE ANALYTICS 3 TRACKING CODE AS A VARIABLE
Every tag that you create will need to be sent to your Google Analytics tracking code. Rather than have to enter the tracking code for every tag, create a User-Defined Variable.
When you go into your new container, you will see the image below - from here you can switch between the Container Overview, your Tags, your Triggers, your Variables and your Folders.

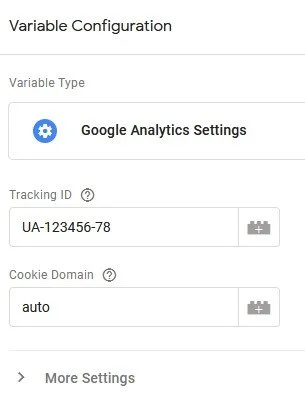
Go into Variables and create a New User-Defined Variable. The Type is Google Analytics Settings and the Value is your Google Analytics Tracking code. You can give your variable any name.
2.2 CREATE A PAGE VIEW TAG TO FIRE ON ALL PAGES
Next you need to create the basic page view tag that will fire for every page view. Create a new tag that is the same as the one below selecting the Google Analytics Settings variable that you just created. Set the Fire Triggers selection to "All Pages".

3. GOOGLE ANALYTICS 4
3.1 CREATE A GOOGLE ANALYTICS 4 PROPERTY ID VARIABLE
Go to the Google Analytics 4 property that you have set up. From the Property Settings, retrieve the Property ID. It should be a 9 digit numeric code.
In Google Tag Manager, go to the Variables area.
Create a variable of type Constant and paste in your GA4 Property ID as the Value.

3.2 Set up the Google Analytics 4 (GA4) Configuration
Create a tag in your container of type Google Analytics: GA4 Configuration. For the Measurement ID paste in the new variable you just created. Add All Pages as a firing trigger.

4. PUBLISH YOUR CONTAINER
At the far right of your Google Tag Manager screen there is a button called Submit. This takes you to a screen where you can enter details of the changes you are publishing and then complete the publish.

5. INSTALL YOUR GOOGLE TAG MANAGER SNIPPET
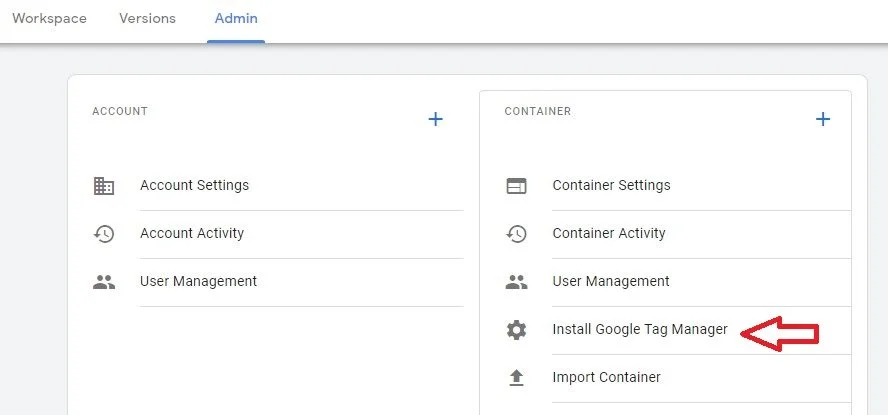
Go to the Admin tab in Google Tag Manager and select Install Google Tag Manager. Follow the instructions on the screen. If you already had a Google Analytics snippet on the website, you need to remove it otherwise every page view will be recorded twice.
6. PREVIEW YOUR GTM CONTAINER TO TEST IT IS WORKING CORRECTLY
Select the Preview option next to the Submit button.

When your website loads, you should see your 2 tags fired (if you have installed both Google Analytics 3 and Google Analytics 4.